
REZENSION – 3d Drucken macht jede Menge Spaß, aber Stunden oder Tage auf die Fertigstellung eines Drucks zu warten, kann die Geduld eines jeden auf die Probe stellen. Noch schlimmer ist es, wenn ein Druck in letzter Minute fehlschlägt. SUNLU hat den T3 auf den Markt gebracht, der mit einer Druckgeschwindigkeit von 250 mm/s wirbt – oder bis zu fünfmal schneller als ein typischer Druck. Sind wir in die Ära des Druckens mit Warp-Geschwindigkeit zum Hobbypreis eingetreten?
Was ist es?
Der SUNLU T3, auch als Terminator 3 bekannt, ist ein FDM-3D-Drucker, der einige hochwertige Funktionen zu einem attraktiven Preis bietet. Besonders hervorzuheben ist das beworbene Potenzial, Druckgeschwindigkeiten von 250 mm/s zu erreichen.
SUNLU ist seit 2013 im 3D-Druckbereich tätig und bietet derzeit mehrere Drucker an. Der T3 ist der kleinste Drucker in ihrer Produktpalette, während die Modelle S8 und S9 Großformatdrucker sind. SUNLU stellt auch Zubehör her und unterstützt seine Produkte mit leicht verfügbaren Ersatzteilen.
Was ist in der Box?
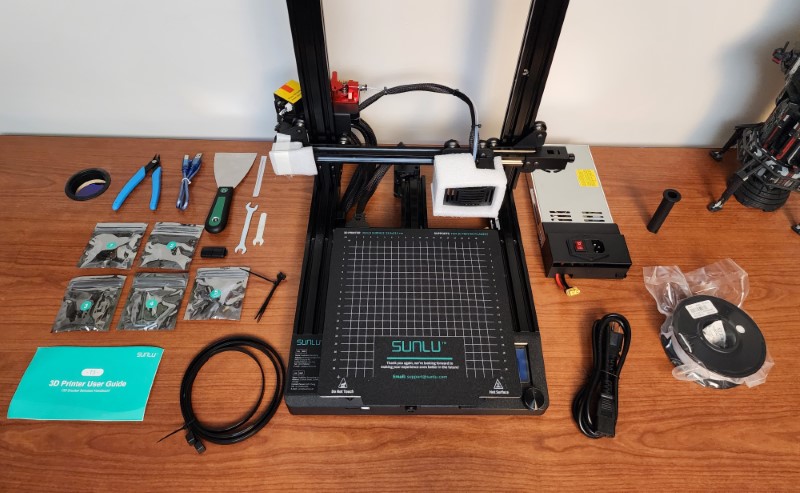
- SUNLU T3 3D-Drucker
- Montagewerkzeuge
- Ersatzteile – zusätzliche Schrauben, 0,4-mm-Düse
- SUNLU PLA Filament
- SD-Karte mit USB-A-Adapter
- Stromkabel
- Schaber
- Filamentschneider
- USB-A-auf-USB-B-Kabel
Hardwarespezifikationen
| Art der Drucktechnologie | FDM |
| Druckgröße | 220×220×250(mm) |
| Anzahl der Düsen | Eins |
| Düsenspezifikationen | 0,4 mm (Kompatibel: 0,4 mm – 0,8 mm) |
| Druckgeschwindigkeit | 20 bis 250 mm/s |
| Maximale Temperatur drucken | 260℃ |
| Maximale Betttemperatur | 100℃ |
| Unterstützte Druckmethode | SD-Karte, PC |
| Leistungsspezifikationen | 115 V/230 V Wechselstrom, 50/60 Hz |
| Maschinengröße | 440×400×470(mm) |
| Nettogewicht des Druckers | 2,2 Pfund |
Aufbau und Merkmale
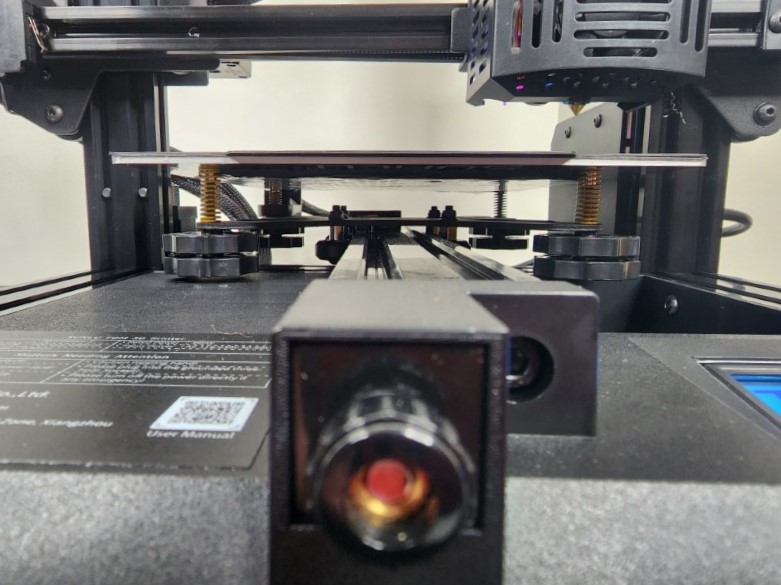
Dies ist ein typisches Bed-Slinger-Design, das sofort an den Creality Ender v3 erinnert.
Zu den zusätzlichen Funktionen gehören:
- Verstopfungserkennung
- 32-Bit-Hauptplatine
- Automatische Nivellierung
- Filamentbrucherkennung
- Fortsetzen bei Stromausfall
- Vollmetall-Doppelzahnrad-Extruder
- Riemenspanner für Riemenscheibe
- Magnetische Plattform
Aufstellen
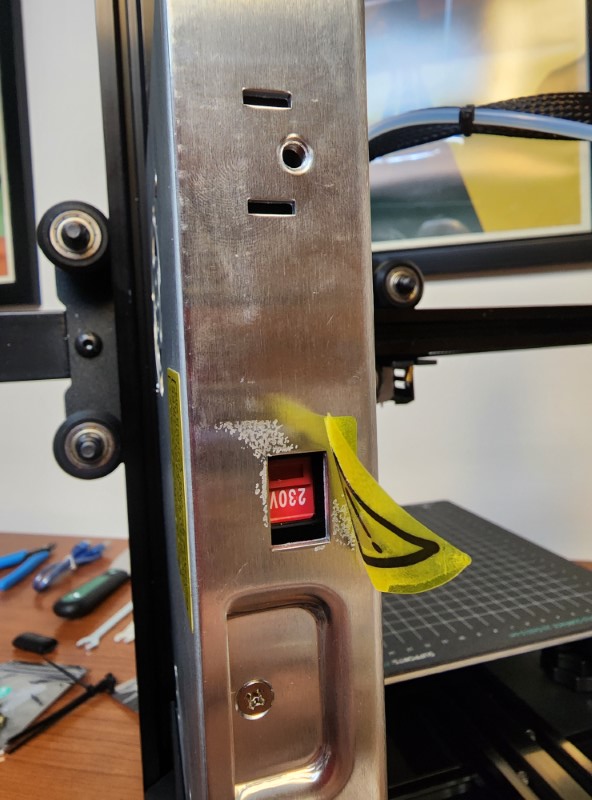
Der SUNLU T3 3D-Drucker kam gut verpackt und fast vollständig zusammengebaut an. Die Montageanleitung ist klar und leicht zu befolgen, und innerhalb von 15 Minuten waren wir bereit, Filament einzulegen und mit dem Drucken zu beginnen. Achten Sie darauf, die Spannungseinstellung am Netzteil zu überprüfen, da meins auf 230 V eingestellt geliefert wurde und auf 115 V umgestellt werden musste, um zu funktionieren.
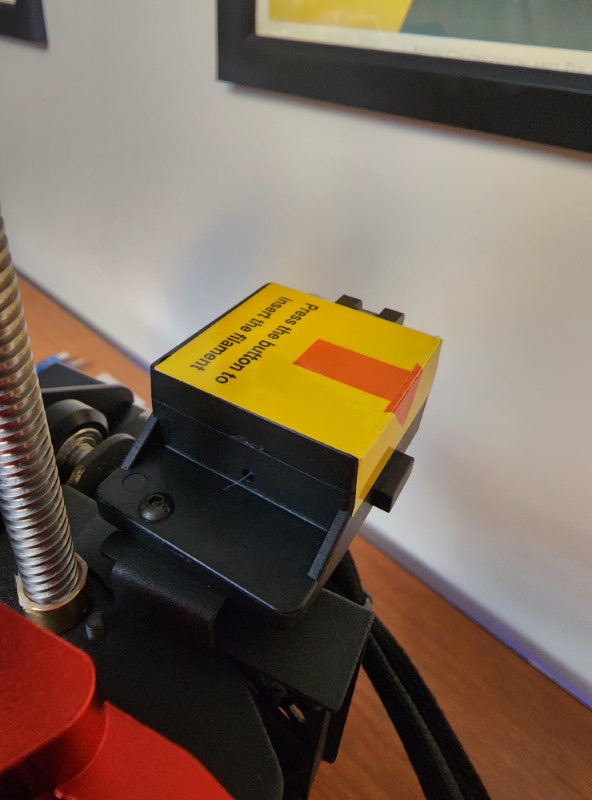
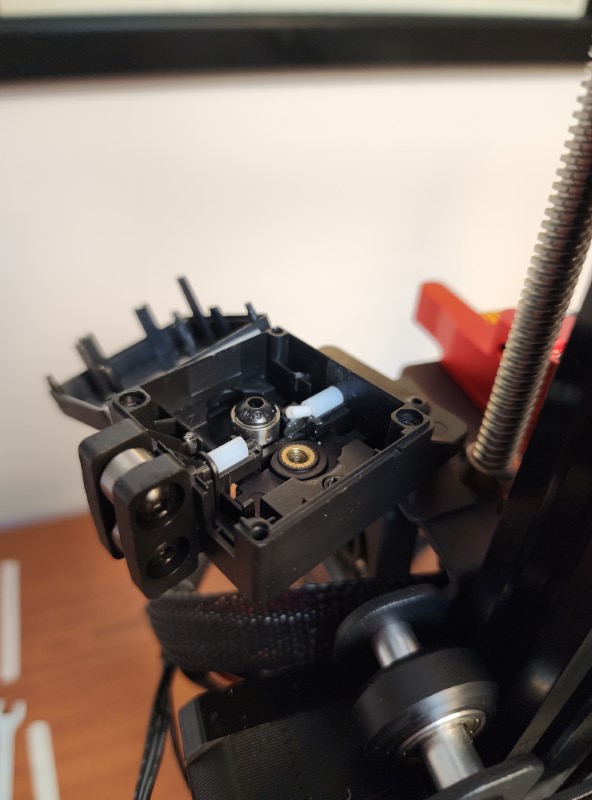
Während des Aufbaus bemerkte ich, dass aus dem Filamenterkennungsmodul Fäden kamen und hatte die Vermutung, dass das Laden des Filaments problematisch sein würde. Tatsächlich ließ sich das Filament nicht laden – und beim Zerlegen des Moduls entdeckte ich ein abgebrochenes Filamentstück, das den Kanal blockierte. Es gibt keine weiteren Hinweise darauf, dass der Drucker verwendet und zurückgegeben wurde, daher gehe ich davon aus, dass dies ein Überbleibsel eines QA-Prozesses ist.
Auf der SD-Karte befinden sich einige Testdrucke, einige Dokumentationen und ein Installationsprogramm für eine ältere Version von Cura. Ich bin zunächst enttäuscht, dass die Testdrucke nur STL-Dateien sind und nicht in Scheiben geschnitten wurden. Vorgeschnittene Dateien helfen dabei, die Einstellungen für den Drucker schneller vorzunehmen, da sie einen Bezugspunkt für die vom Hersteller vorgeschlagenen Einstellungen bieten. Insbesondere verfügt die auf der SD-Karte enthaltene Version von Cura nicht über ein Profil für den Drucker. Auf der SUNLU-Website erhalten Sie ein Cura-Installationsprogramm mit dem SUNLU T3-Profil sowie eine aktualisierte Firmware.
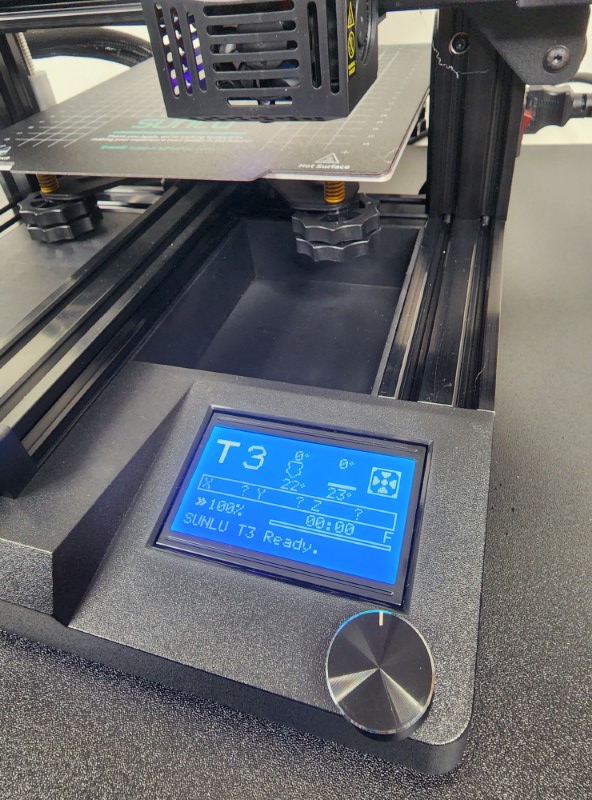
Ich fand das Bett größtenteils eben vor und nach einigen Feineinstellungen waren wir bereit, loszulegen!
Leistung
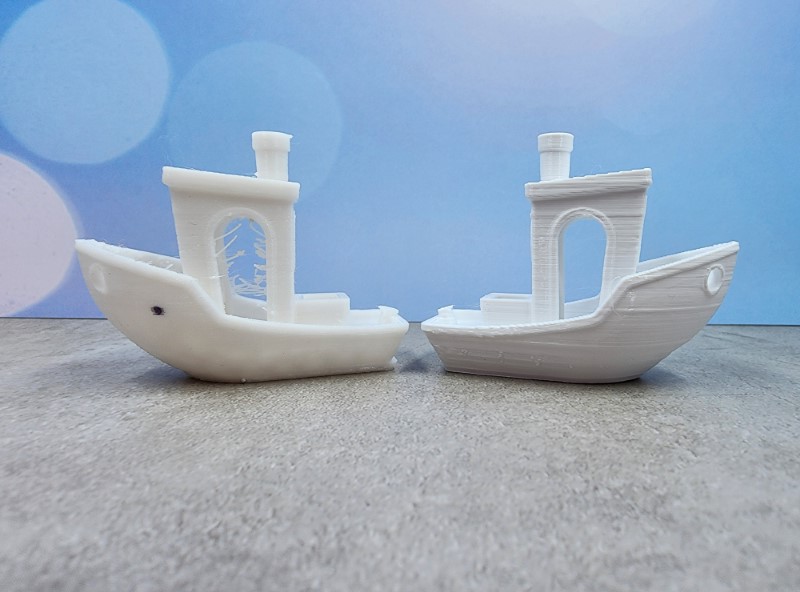
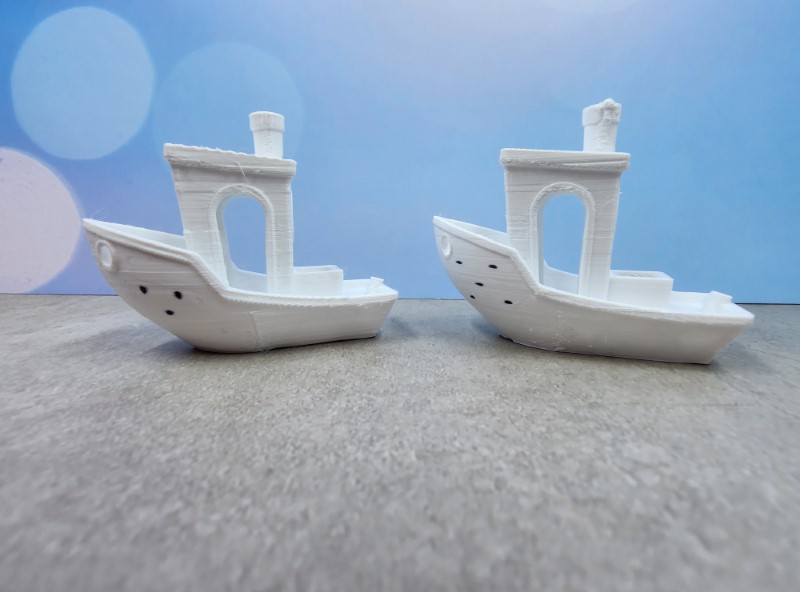
Ich habe sofort nach dem Auspacken einen Druck ausgeführt und dabei einige Schätzungen für die Slicer-Einstellungen verwendet, die auf meinen Erfahrungen mit meinem anderen Drucker basieren. Das resultierende Benchy wies einige Schichtverschiebungen und übermäßiges Stringing auf, und ich vermutete, dass es am Extruder zu heiß war. Ich habe auf einige Kalibrierungsdrucke umgeschaltet, um die Rückzugseinstellungen und die Temperatur einzustellen: 35 mm (+10 vom Standard) bzw. 190, und die Ergebnisse sprechen für sich.
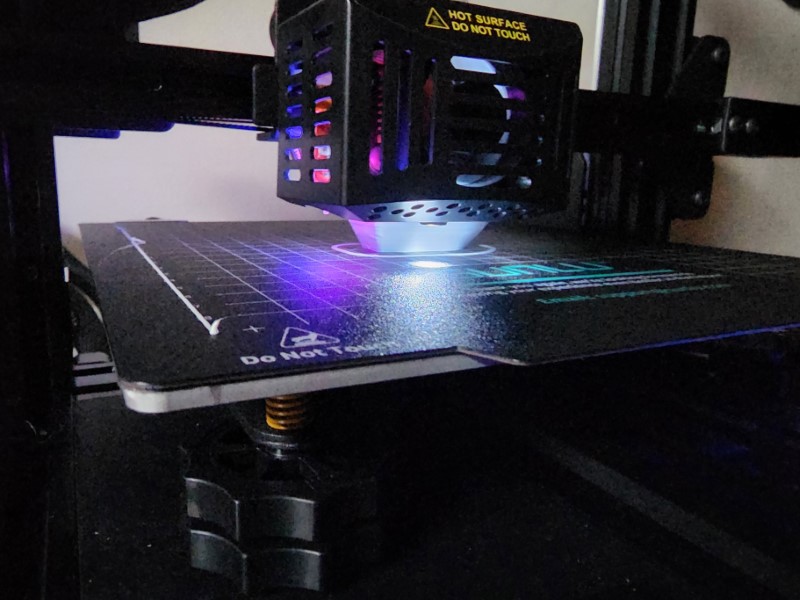
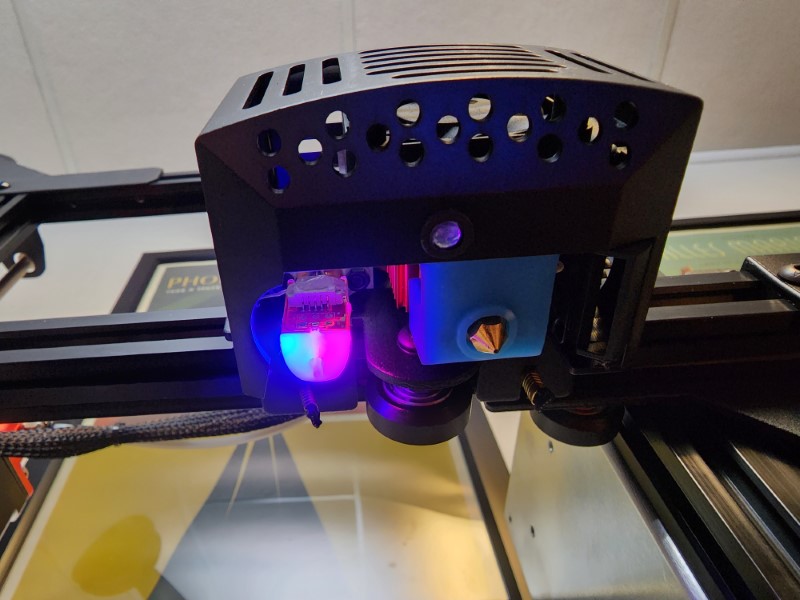
Die automatische Nivellierungsfunktion funktioniert ziemlich gut und verwendet ein BLTouch. Vor jedem Druck werden 16 Punkte des Druckbetts automatisch überprüft. Der Z-Offset kann manuell eingestellt werden, was empfohlen wird, um sicherzustellen, dass die Düse nicht zu nahe am Druckbett ist. Die manuelle Einstellung für den Z-Offset funktionierte sofort einwandfrei, aber seit dem Firmware-Update funktioniert sie nicht mehr. Aus irgendeinem Grund blinkt das BLTouch jedes Mal rot, wenn ich es versuche, obwohl es während des automatischen Nivellierungsprozesses immer noch einwandfrei funktioniert. Hoffentlich wird dies in einem zukünftigen Update behoben, da dies kein mechanisches Problem zu sein scheint. Hilfreicherweise können Sie den Z-Offset während eines laufenden Drucks ändern, sodass Sie bei Bedarf schnell Anpassungen vornehmen können.
Zum Thema BLTouch habe ich festgestellt, dass die Verkabelung des BLTouch-Moduls nicht richtig mit dem Anschluss verbunden war. Obwohl Heißkleber ärgerlicherweise dafür sorgt, dass sich Anschlüsse nicht von selbst lösen, stellte ich fest, dass der Anschluss des BLTouch-Moduls auf den Heißkleber angewiesen war, um die Verkabelung selbst in ihrer eigenen Verbindung zu halten. Mit anderen Worten: Wenn der Heißkleber entfernt wird, kommt die Verkabelung selbst aus dem Anschluss heraus.
Während ich keine Probleme mit Verstopfungen hatte, funktionierten andere Funktionen genau wie angekündigt. Durch Sabotage des Filaments wurde der Auslaufsensor erfolgreich ausgelöst, und das Unterbrechen des Stroms an der Wand löste die Wiederaufnahme des Stromausfalls aus, sobald der Strom wieder da war. Ich bin absolut begeistert von dem magnetischen Druckbett mit der mitgelieferten flexiblen Druckoberfläche, da es das Entfernen fertiger Drucke super einfach macht.
Das vielleicht verblüffendste Merkmal dieses Druckers ist die Behauptung, er drucke mit 250 mm/s, also etwa fünfmal schneller als üblich. Das bringt alle möglichen Herausforderungen mit sich, und obwohl ich glaube, dass die Motoren in der Lage sind, das Bett und den Extruder schnell genug zu bewegen, wird dies die Qualität beeinträchtigen. Um dies zu testen, habe ich einen Benchy mit 200 mm/s geschnitten, die Temperatur wie von SUNLU vorgeschlagen auf 200 erhöht und den Drucker in den Schnelldruckmodus geschaltet. Ich konnte dem Drang nicht widerstehen, Picard zu imitieren, indem ich „engage“ ausrief, als ich den Warp-Geschwindigkeitsdruck startete. Der Benchy wurde letztendlich erfolgreich gedruckt, und er war definitiv schneller – aber auf Kosten der erwarteten Qualität. Diese schnellen Drucke sind gut für allgemeine Entwurfstests, aber für den normalen Druck werde ich wahrscheinlich bei unter 100 bleiben.
Was ich mag
- Gängige Upgrades sind integriert
- Standardplattform für einfache weitere Anpassungen und Reparaturen
- Kostenpunkt
- 1 Jahr Garantie
Was ich ändern würde
- Qualitätskontrolle im Testprozess und bei der Firmware-Veröffentlichung
- Die Möglichkeit zum kabellosen Drucken wäre toll
- Verfügbarkeit vorgeschnittener Testdrucke auf der mitgelieferten SD-Karte als G-Code-Referenz
Abschließende Gedanken
Der SUNLU T3 3D-Drucker ist ein 3D-Drucker mit vielen Funktionen zu einem Preis, der ihn zu einer sehr attraktiven Option macht. Die Funktionen sind im Allgemeinen alle gut umgesetzt, obwohl es einige Fehler gibt, deren Behebung etwas Zeit und Geduld erfordert. Sobald man sich eingewöhnt hat, funktioniert der Drucker recht gut und ich würde ihn empfehlen.
Zum Schluss möchte ich meinen Gadgeteer-Kollegen danken Mike Dixon Und Zack Chongulia für ihre Bereitschaft, einige ihrer 3D-Druck-Wissenschaften mit uns zu teilen. Sehen Sie sich unbedingt ihre Testberichte zu anderen 3D-Druckern an!
Preis : 249,99 $
Bezugsquellen : SUNLU.COM
Quelle : Das Muster dieses Produkts wurde bereitgestellt von SONNENLU .