
It’s quite amazing how quickly 3D printers went from being an expensive tool for hobbyists to becoming about as common and affordable as VR headsets. What used to cost thousands may only cost you a few hundred dollars. Including the one we have been playing with for around a week now—the SUNLU T3 (aka Terminator 3) Fast-Printing FDM Printer.
This is one of a handful of models out that has been promising blazing fast printing speeds. Because let’s b real here, the time it takes to print something can be quite testing to anyone’s patience.
With that, this one is spec’d to print at speeds as fast as 250mm/s, which is pretty impressive. If you can slice it up properly to actually get anything useful out of such a speed, at least.
What’s also impressive is the price. At full price, this is decently impressive. But it sounds like it won’t be too hard to get it on sale, which is where it begins to really take on some of the competition out there. It comes with a number of useful features within its price range, some taking on models that would normally be a bit more expensive.
Something like the Ender 5 Pro is going to be a little more robust physically, sure. However, when it comes to features vs price, this one fills a big gap. It takes on models like the Ender 3 and equivalent while bringing with it some features that some users typically have to install after the fact.

Some of these features include a filament runout sensor and clog detection—both of which have the ability to pause and resume the print where you left off. As well as resume on power outage (although this one is a bit of an expectation anymore these days). You also have auto-leveling with 16 points of detection, which is one of the most popular upgrades any enthusiast goes after in order to avoid having to manually level the printer each time it needs it.

It comes with a metal double-gear extruder, a magnetic build plate, and a user-friendly X/Y axis adjustment. It even has a decent print area, covering 220x220x250 (mm).

You can get up to 260C temperatures from the nozzle and up to 100C at the bed. It isn’t the hottest out there, but it is enough for even ABS in some cases (depending on the brand). You might not be able to do a lot with ABS, but it at least offers a huge spread of filament options.
All-in-all, it feels like a decently heavy hitter for its size and price. The real test is actually putting it to work on various prints to see how well it does.
PerformanceThe build process is pretty straight forward. The instructions don’t really include more information since you don’t really need much. There is just a simple 12-step process detailed out with numbered packages relating to each step.

You bring the Z-Axis section together with the rest of the body and bolt it together. Then the power-supply (with one cable connection), and the filament holder at the top. That’s it. Far better than some of the models we have come across.
For a detailed look at the build process, refer to the unboxing video after the conclusion below.
(Note: You’ll want to look at the voltage selector on the back to make sure it is set to 115 and not 230, else it won’t power on when you flip the power switch on the supply. Ours came to us with 230v selected when we checked and had to flip it)

It comes with a nozzle already screwed into place and with an extra one for when needed (both 0.4mm). As well as a auto-level sensor probe installed with three more backups. All other wires come already connected to where they need to go.
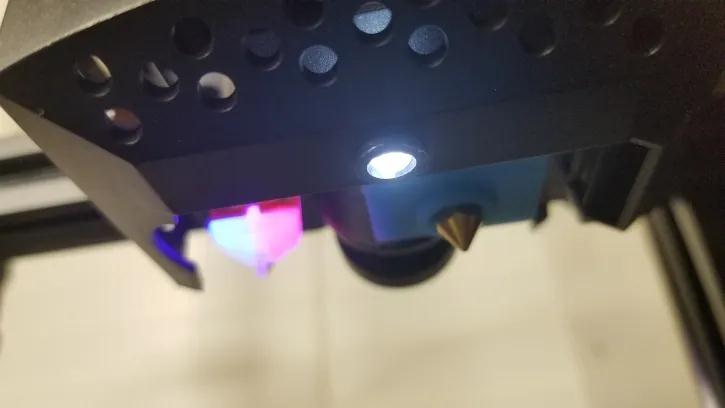
It even has a small LED light that lights a very small portion of the print as it is working. It isn’t the most effective light and it won’t make any difference to image quality if you are recording your print with a camera, but it does allow you to see into the little crevices it is working on while it is printing.

From there, we didn’t even bother to test the level of the bed. We gave it a visual look and it looked “good enough” to put the auto-level to the test. Why bother with the initial level if it can do a thorough job at doing it for you, right?
Since then, we still haven’t adjusted the level of the bed. However, if you do know how to properly do it yourself, it wouldn’t hurt to do it at least once for an added level of accuracy.
The printer doesn’t come with any pre-sliced test files, which was a bit odd. Not the best marketing as it always helps to include a few on the card to help show what the model can really accomplished when sliced properly. Instead, they include a few .STL files on there with “test” in the title, but you are on your own when it comes to trying to figure out how to slice them.
Being on your own is a little rough on this one since Cura doesn’t have any profiles for it (or any SUNLU model for that matter). So you have to either add it as a custom machine, or find a machine profile that comes close enough. So far, many have chosen options like the Ender 3 with luck. This was true for our experience as well. We chose the Ender 3 machine profile since they could almost be twins.
From there, we modified some of the settings to account for printing at higher speeds. A little more flow and a little more heat (mostly). It might even bet better to use a larger nozzle (ie, 0.6mm), although we haven’t gotten that far just yet in our tests. But I am sure we will eventually as we explore various techniques.
As for the initial test speed, we started off a print at 200mm/s to see what would happen with some of our guesstimated slicer settings. The moment it started, it felt as though it wouldn’t work out. However, after a few layers it started to come together and a print was forming. Not the best quality, but we aren’t used to printing at these speeds. The end result proved that it may take some time and tweaking before we can print this fast.

We then slowed it down to 100mm/s and got the first bracket you see in the above image (left print). Not bad for some rough setting and zero experience with the model. However, it wasn’t the most robust print. So we slowed it down to 60 with some familiar settings we use on the Ender 3 and 5. The result, was a fantastic print that still needed some tweaking (fair enough). This can be seen in the above image (middle print).
Then we dialed in the settings a little more and printed a miniature version of a Batman bust we found on the Thingiverse. The resulting print, this time, was quite acceptable. Enough to say that I’d mostly trust those settings if we wanted to print a much larger version of the bust (obviously, the right-most print in the above image).

At this point, we were sold on the idea that everything will work out. Through trial and error, we will squeeze some pretty good prints out of this. There will be some extra attention to the settings when it comes to getting it to print faster though. Even with this machine, ultra-fast print settings just don’t result in more structurally sound prints. Nor will they look that nice half the time. However, if all you need is a simple print to act as a solution or something (a spacer, bracket, or anything else that doesn’t need to “look pretty”), you might just get lucky.
In most cases, though, you won’t be using the fast-print capabilities. Which leads us to “Fast Mode” setting on the printer (bottom of main menu). It is advised that you turn this off if your slicer settings are already configured for a fast print (or you simply have a complex gcode file). Else the resulting print may be a little too fast, causing it to fail. When this is enabled, it sure does print quickly. It printed one of the above brackets in what seemed like less than 10 minutes. Although we didn’t even bother to take a photo of it as the slicer settings were already sloppy as it was. So I think it was trying a little too hard at that point resulting in a bit of a mess.
We will have to try printing various files with basic slicer settings, and then turning on the fast print mode within the printer’s LCD display. To see what kind of prints work best with this setting.
We also found that the auto-leveler does take the nozzle a little too close to the print/bed. This can cause it to put a little too much pressure, limiting flow (or sometimes causing light scraping), which is no good. So you will find yourself adjusting some things to get the most of it. That being said, we have had to do this with a number of models, so this is also no surprise.
As mentioned, it can print up to 260C, allowing you to even make use of some ABS options. However, most of your printing will fall into the range of PLA through PETG. But it is nice to know that you can squeeze at least some ABS printing out of it if you wanted to. You just don’t want to work it too hard at these temps, else you risk reducing the strength of the magnetic bed or demagnetizing it completely.
We also found that it didn’t take long to reach the set temperatures. Therefore the heating capabilities on this model are pretty nice when it comes to cutting print times by every second possible.
Like most printers, it does come with a small test roll of filament. It also comes with various tools for performing maintenance, as well as spare zip ties. You get a scraper tool and cutters.

As mentioned, it also comes with an extra 0.4mm nozzle and three probes for the auto-leveler. As well as a few extra bolts. That’s it for extra parts though, so if you wind up with anything more than this, you might have done something wrong during the build process.
Our Conclusion
Honestly, this is a great model for both beginners and those looking to take things a little further. It doesn’t take much to get it put together and working on your first print. It has a decent size build plate, allowing it compete with most everything out there (when it comes to print size).
Like any 3D printer, it is going to take time to dial it in just right. We are still working on it ourselves (we’ve barely scraped the surface here). However, it does feel like it will be a workhorse once we’ve gotten there.
Although it likely won’t ever hit the promised speeds. At least, not with the quality of print we’d be looking for. That being said, it shouldn’t be too difficult to hit speeds of around 100mm/s or a little more, with the right settings.
It really should have come with a few properly sliced files from SUNLU on the SD card. This would have really done some good for SUNLU’s marketing department. Not only that, but it would allow users to take a peak a the gcode for hints at what their own setting should be when slicing new files in Cura (or whatever program they prefer).
It is a pretty solid printer for the price though and comes with a lot of useful features. Thus it ended up doing very well by us. Although we did subtract a little for being left in the dark when it comes to preferred slice settings in any given scenario,
Now just comes the test of time as we continue to dial it in further and further.
SUNLU T3:https://bit.ly/3QsuGY3
Original link:https://www.pocnetwork.net/technology-news/sunlu-t3-fast-printing-fdm-3d-printer/