
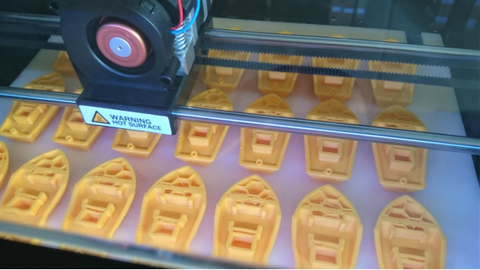
When it comes to 3D printing, achieving high-quality prints is the ultimate goal. However, many hobbyists and enthusiasts struggle to obtain the level of precision and detail they desire. That's where the right slicer settings come into play. The slicer software is crucial in converting your 3D design into a code that the printer can understand. With the right slicer settings, you can optimize your prints for superior quality, ensuring smooth surfaces, accurate dimensions, and strong structural integrity.
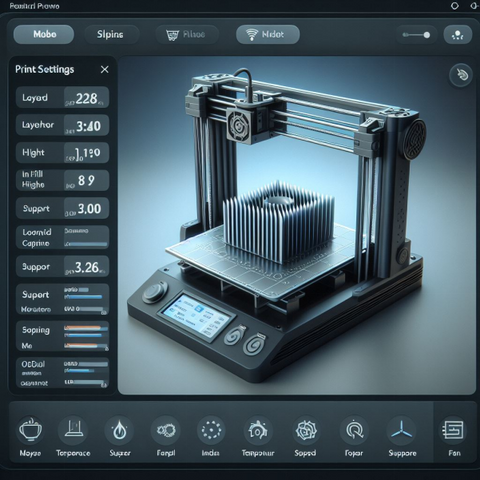
The importance of slicer settings in 3D printing
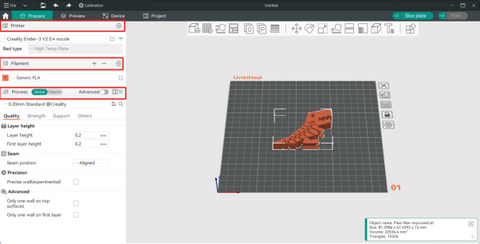
Slicer settings play a crucial role in the outcome of your 3D prints. The right settings can make the difference between a mediocre print and a masterpiece. When you select the appropriate settings, you have the power to optimize various aspects of your print, including layer height, print speed, infill density, and cooling settings.
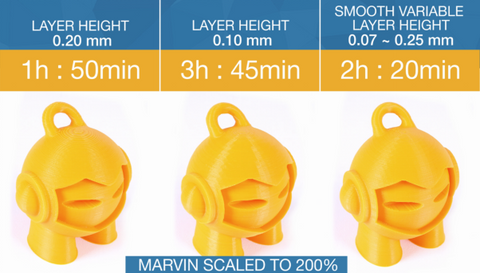
1. Layer height: This parameter determines the thickness of each printed layer. Smaller layer heights result in finer details but increase print time.Finding the right balance between resolution and speed is crucial.
2. Print speed: The speed at which the print head moves affects both print time and quality. Slower speeds allow for more precise movements, resulting in higher quality prints. Experiment with different speeds to find the sweet spot for your specific project.
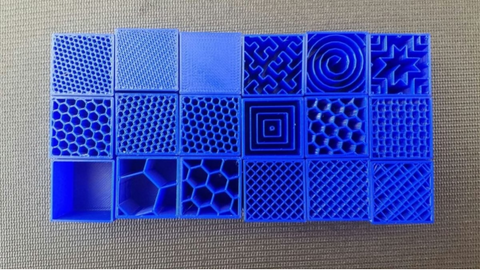
3. Infill density: Adjusting the percentage of infill determines the strength and durability of your prints. Higher percentages provide more structure, while lower percentages save material and reduce print time. Consider the intended use of your print when selecting the infill density.
4. Cooling settings: Regulating the temperature during printing can help prevent issues like warping and stringing. Experimenting with cooling settings can lead to cleaner, more precise prints.
Experimenting with temperature and speed settings
In addition to the layer height, print speed, infill density, and cooling settings, experimenting with temperature and speed settings can further enhance the quality of your 3D prints.
Temperature settings play a significant role in ensuring optimal print quality and material adhesion. Adjusting the temperature depending on the filament type and brand can result in improved layer bonding and reduced warping. It is crucial to refer to the manufacturer's recommendations and conduct test prints to find the ideal temperature for your specific filament.
Similarly, tweaking the print speed can have a profound impact on the print quality. Slower print speeds allow for more precise movements and better surface details, especially for intricate designs. However, higher print speeds can be suitable for large, simple prints where speed is prioritized over fine details.
Optimizing support structures for complex prints
support structures play a crucial role in 3D printing, particularly when dealing with objects featuring overhangs, bridges, or intricate geometries. These structures are vital to preventing issues such as sagging, warping, and distortion during the printing process. While automatic support generation features in slicer software are convenient, they may not always produce the most efficient or effective support structures.
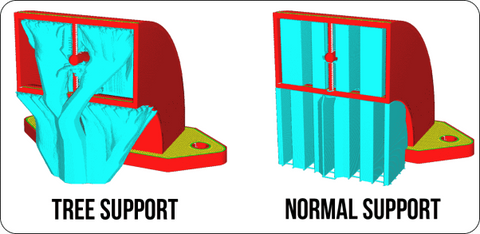
One aspect to consider when optimizing support structures is the choice between different support types, such as tree supports and normal supports. Tree supports are a more intricate form of support structure that resembles branching structures, offering better material efficiency and easier post-processing removal. On the other hand, normal supports are more traditional and straightforward.
Tree Support;
Pros:
Material Efficiency: Tree supports use less material than traditional supports, as they follow the contours of the overhang more closely.
Easier Removal: The branching nature of tree supports often makes them easier to remove during post-processing.
Cons:
Complexity: Tree supports can be more complex to generate and might require fine-tuning to achieve optimal results.
Stability: In some cases, tree supports may not provide as much stability as traditional supports, especially for large or heavy overhangs.
Normal Supports;
Pros:
Simplicity: Normal supports are straightforward to generate and generally easier to understand for beginners.
Stability: Traditional supports can offer robust support for a wide range of geometries, especially for larger or heavier structures.
Cons:
Material Usage: Normal supports may use more material compared to tree supports since they create a solid structure underneath the overhang.
To optimize your support structures further, consider manually adding supports only where necessary and adjusting support density. This approach can lead to significant material savings, reduced print time, and easier post-processing. Experimenting with different support materials and density settings can also enhance overall print quality and surface finish, ensuring a successful and efficient 3D printing process.
The impact of filament choice on print quality
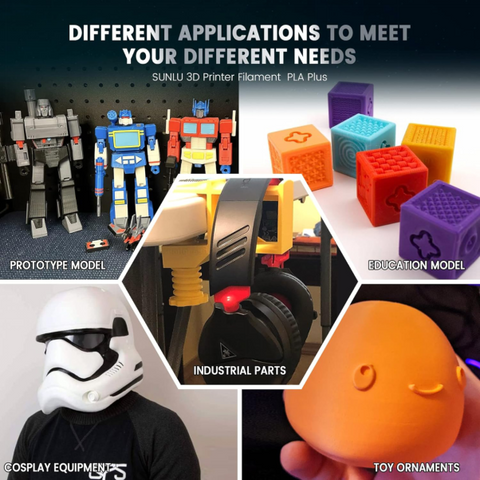
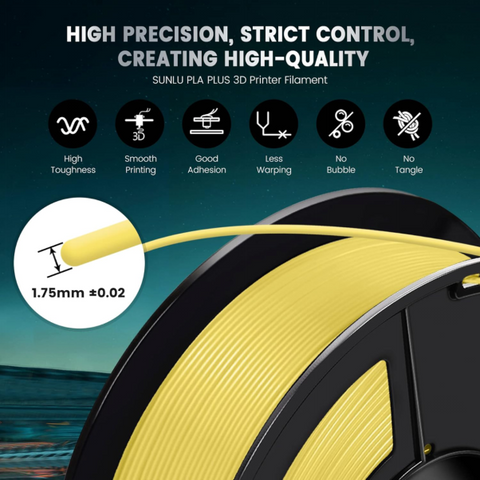
At Sunlu, we understand the pivotal role filament choice plays in achieving outstanding 3D print results. Our 3D Printing Filament stands out in the market, recognized for its consistent and reliable performance that ensures a seamless printing process. Crafted with precision, each Sunlu filament spool undergoes stringent quality standards, promising users a superior and reliable printing experience.
When delving into the world of filament selection, it's crucial to comprehend the unique properties each type offers. Take PLA filament, for instance, celebrated for its user-friendly nature, minimal warping tendencies, and an array of vibrant color options. Its versatility makes it an ideal choice for beginners and projects requiring intricate details, guaranteeing a smooth and trouble-free printing experience.
In contrast, ABS filament, known for its heightened strength and durability, caters to applications prioritizing robustness. While it demands a heated bed and a well-ventilated environment due to potential fumes, its structural integrity makes it a valuable asset for certain printing needs.
Explore another impressive option with Sunlu's PETG filament, combining the best of PLA and ABS properties. Offering enhanced strength, heat resistance, and chemical resistance, PETG proves to be a versatile choice across a wide spectrum of applications. Additionally, our range includes specialty filaments such as flexible or wood-infused options, addressing specific needs like flexibility or adding a unique aesthetic to your printed objects.
Our filament's excellent printability and unwavering quality contribute significantly to achieving superior results, making it the preferred choice for both novice and experienced 3D printing enthusiasts alike. Welcome to a world of reliable, high-performance printing with Sunlu 3D Printing Filament.
How to Calibrate your Filament
Calibrating your filament is a crucial step in optimizing the print quality of your 3D prints. Properly calibrating your filament ensures that the printer is extruding the right amount of material, resulting in accurate dimensions and consistent layer adhesion.
To calibrate your filament, start by measuring its diameter with a caliper. This allows you to input the correct filament diameter in your slicer settings, ensuring accurate calculations for filament flow.
Next, perform a temperature calibration test. This involves printing a small calibration object at different temperature settings to determine the ideal temperature for your specific filament. Adjusting the temperature can significantly impact print quality, so finding the optimal temperature is vital.
Additionally, it's essential to calibrate the extrusion multiplier or flow rate. This calibration test measures the actual amount of filament extruded compared to the expected amount. By adjusting the flow rate, you can ensure that consistent amounts of filament are being deposited, resulting in precise prints.
To Conclude
By properly calibrating your filament and fine-tuning your slicer settings, you can achieve superior print quality with your 3D prints. Calibrating the filament ensures accurate dimensions and consistent layer adhesion, while temperature calibration helps determine the optimal temperature for your specific filament. Adjusting the extrusion multiplier or flow rate ensures that consistent amounts of filament are being deposited, resulting in precise prints.
However, these calibration steps alone are not enough to achieve the best print quality. The slicer settings also play a crucial role. In the next section, we will explore how to fine-tune your slicer settings to take your print quality to the next level.
FAQ Section
- What is layer height, and how does it affect print quality?
Layer height refers to the vertical thickness of each layer in your 3D print. The layer height you choose will impact the level of detail and surface quality of your print. A smaller layer height will result in finer details but longer print times, while a larger layer height will be faster but may sacrifice some detail. Experiment with different layer heights to find the sweet spot for your specific print.
- How does print speed affect print quality?
Print speed determines how fast the printer moves and deposits filament. Higher speeds may lead to decreased print quality, as the printer may struggle to accurately place filament at faster rates. Slower speeds generally result in higher quality prints, as the printer has more time to accurately deposit filament and control cooling times.
- What is infill density, and why does it matter?
Infill density refers to the amount of material that fills the inside of your print. Higher infill density means more material and increased strength, but also longer print times and more material usage. Lower infill densities result in lighter and faster prints but may sacrifice strength. Choose the appropriate infill density based on the desired strength and weight of your print.
- Are there any other important slicer settings?
Yes, there are several other slicer settings that can impact print quality, such as support structures, print cooling, and print orientation. Support structures provide extra support for overhangs and bridges but can impact the surface finish. Proper fan cooling settings can improve print quality and reduce warping. Print orientation can also affect how well details and overhangs are printed.
——————————————————